
Today’s post is a click-by-click tutorial to show you how to connect your cPanel domain-based email to your Gmail account.
Having a name@yourdomain.com email will help you to look more professional in your business. It also is necessary if you’re using an email newsletter account like MailChimp to increase the deliverability of your newsletters. But checking multiple email accounts is time-consuming and can be overwhelming.
We have too many accounts to deal with already, between our email, texts, Facebook messages, social media, voice mail, etc.! So let’s streamline it all and have the emails in one place.
Google Workspace – It may be a better option for you instead of cPanel emails.
Cpanel email is still a popular choice; Google Workspace (used to be GSuite) offers many advantages over cPanel email.
With both platforms, you get a professional email service with your own domain name. For example: yourname@yourdomainname.com. Here’s why I switched from cPanel emails to Google Workspace:
All the Google Tools:
Google Workspace gives you access to all the Google tools like Gmail, Google Drive, Google Docs, Google Sheets, Google Slides, etc. I love the ability to use these tools to collaborate with my team so we can share and edit documents together.
More Storage:
I was always running out of room in my cPanel email. Google Workspace gives me plenty of storage for emails and files. I never run out of space now.
Advanced spam filtering and security:
Spam stinks, and with Google Workspace, I have a whole lot less of it. Google is known for being the guru in the email department, and it definitely helps to protect against phishing attempts, spam, malware, etc.
Ease of use on various devices:
Google Workspace is designed to work seamlessly across devices and platforms. I can access my emails and files from anywhere on any device, and any updates I make are synced across all devices.
Managing a Team:
I can easily add or remove users as my team grows. This is one of my favorite features and helps me keep my business operating smoothly and securely. Plus, it’s only $6 per user for me at the time of writing this post, which helps me keep my overhead low.
I encourage my clients to go with Google Workspace over cPanel email for these reasons. If you’re interested in checking out Google Workspace, please submit a support ticket and I’ll be happy to send you a 10% off referral code for your first year! (Google only gives out one-time use codes which is why I need to manually send it to you instead of pasting it here for everyone to use.)
However, if you just want to connect your domain email to gmail, here’s how to do that:
Step 1: You’ll want to set up your cPanel email according to your hosting company’s instructions.
To set up a cPanel email, you can follow these general steps:
Here are some quick links to access the cPanel email tutorials for popular hosting companies.
- Set up cPanel email accounts in GoDaddy
- Create email accounts in SiteGround.
- How Do I Create Email Accounts in cPanel with Hostgator?
- How to Add, Delete, and Manage your Bluehost email accounts.
Connect Domain to Gmail: Let’s Import Your cPanel Email Account into Gmail
First, log into both your webmail account and your Gmail account. Your webmail account should be accessible through yourdomain.com/webmail.
In Gmail click the gear in the top right corner and open up settings.

Then click on the tab labeled, “Accounts and Import”

Then click on, “Add an Account” under the “Check Mail from Other Accounts” section.

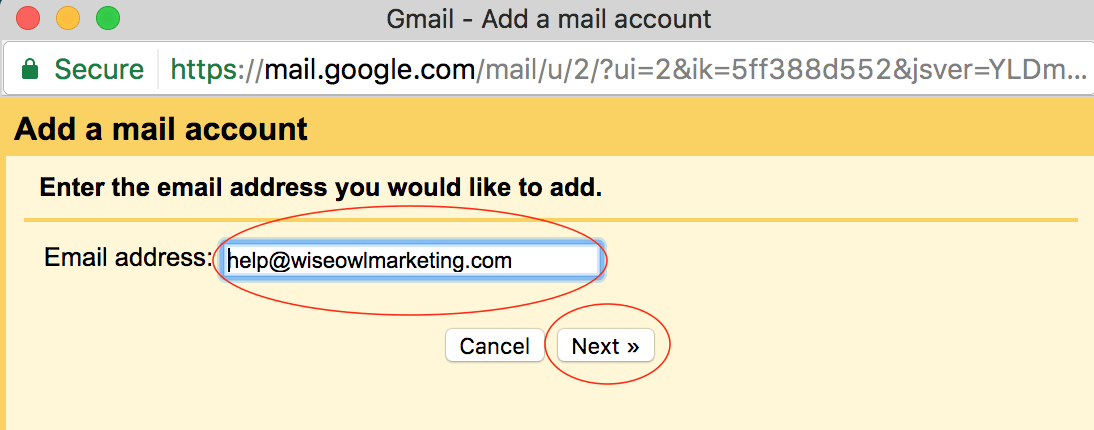
A new window should pop up. Enter your domain-based email and click “Next.”
Check to import emails from your other account and click “Next.”

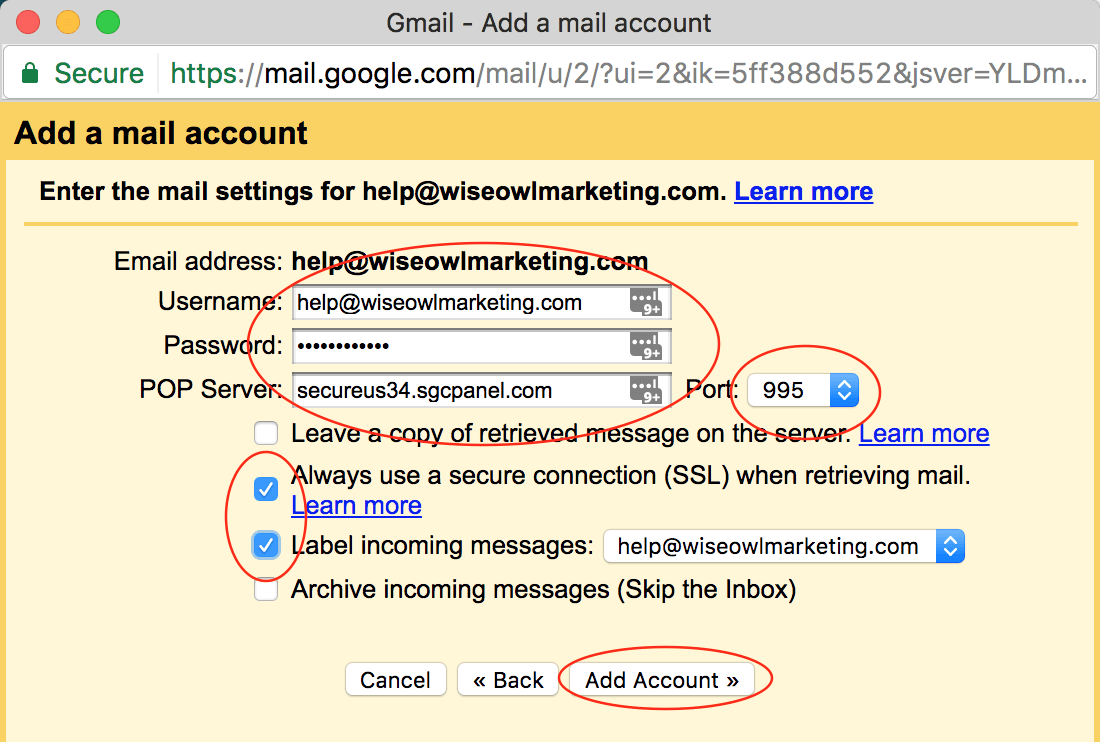
Enter all the information inside of the red circles and click “Add Account.” Be sure to use the correct user name, password, and server settings provided to you by your hosting company or Website designer. I like to label my incoming messages so I can sort through them more easily.
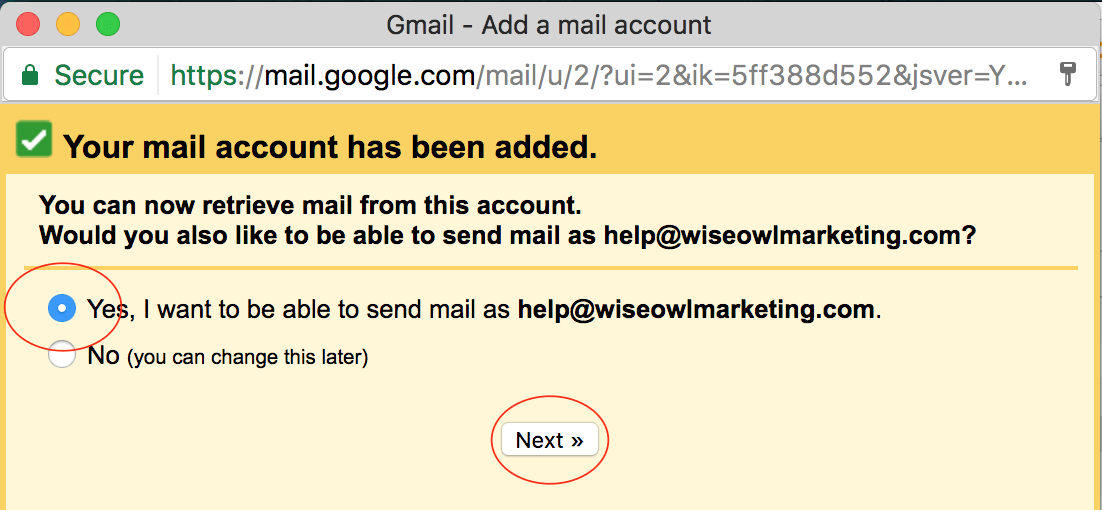
Click Yes you want to be able to send mail as yourdomain.com and click “Next.”
Enter your Name, check treat as an alias, and click “Next Step.”

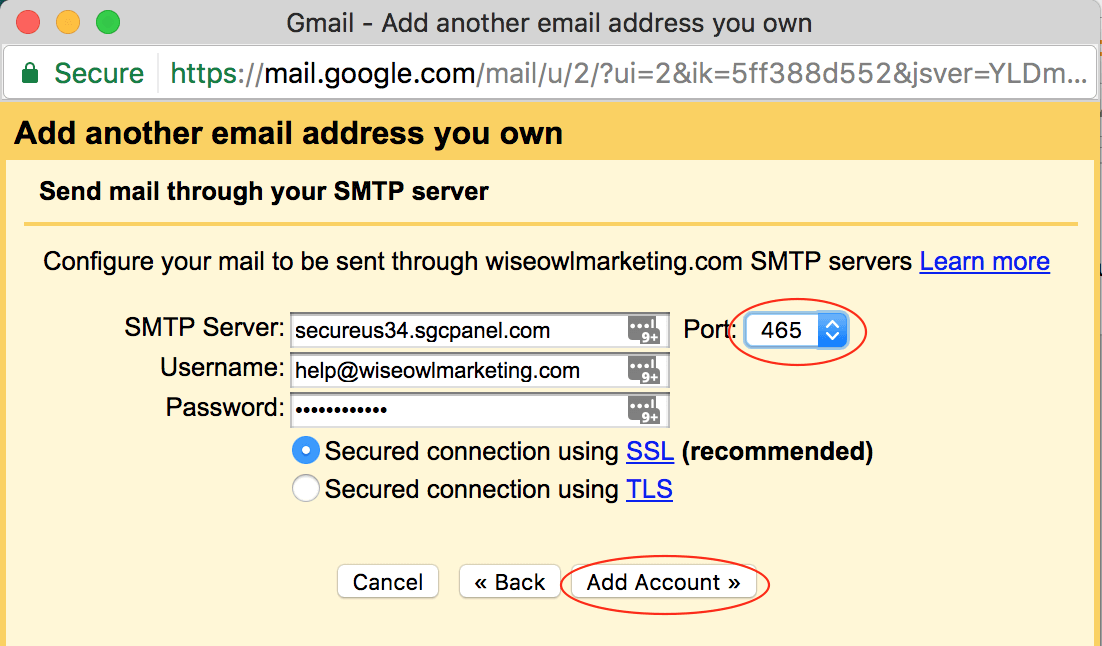
Once again, you will need to add your server information, username, password, and port. Use the “recommended” security setting and click “Add Account.”
Next, you’ll be asked to enter a verification code. Leave this tab open and go to your Webmail tab.
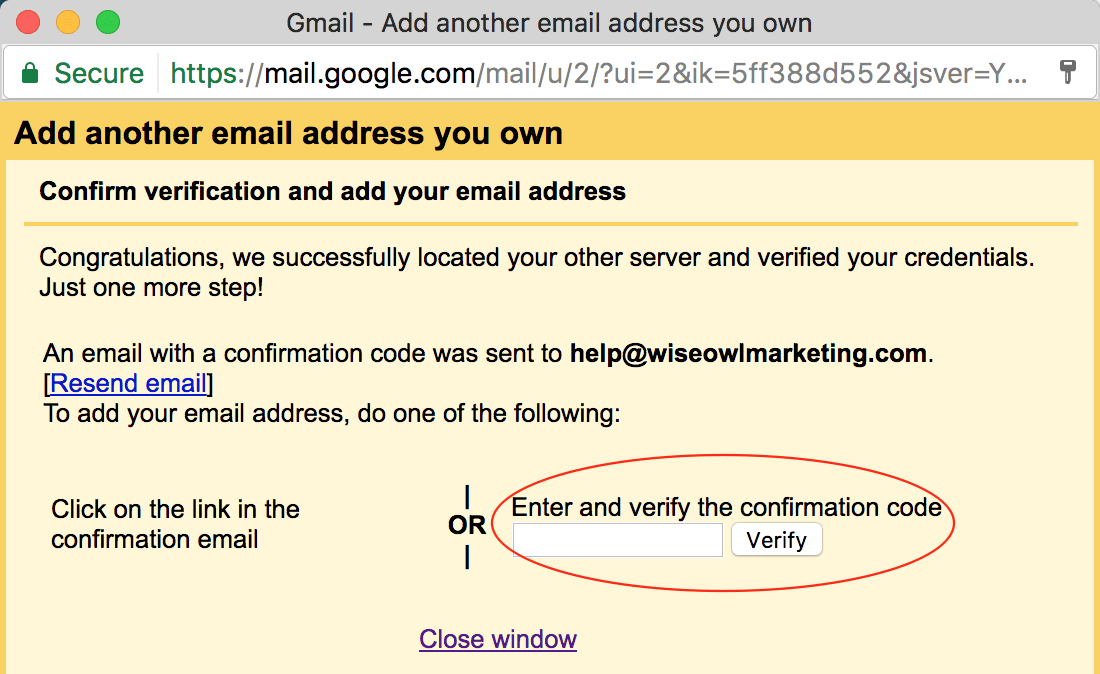
You should receive an email from Gmail with your confirmation code inside of it.

Copy the code to your clipboard
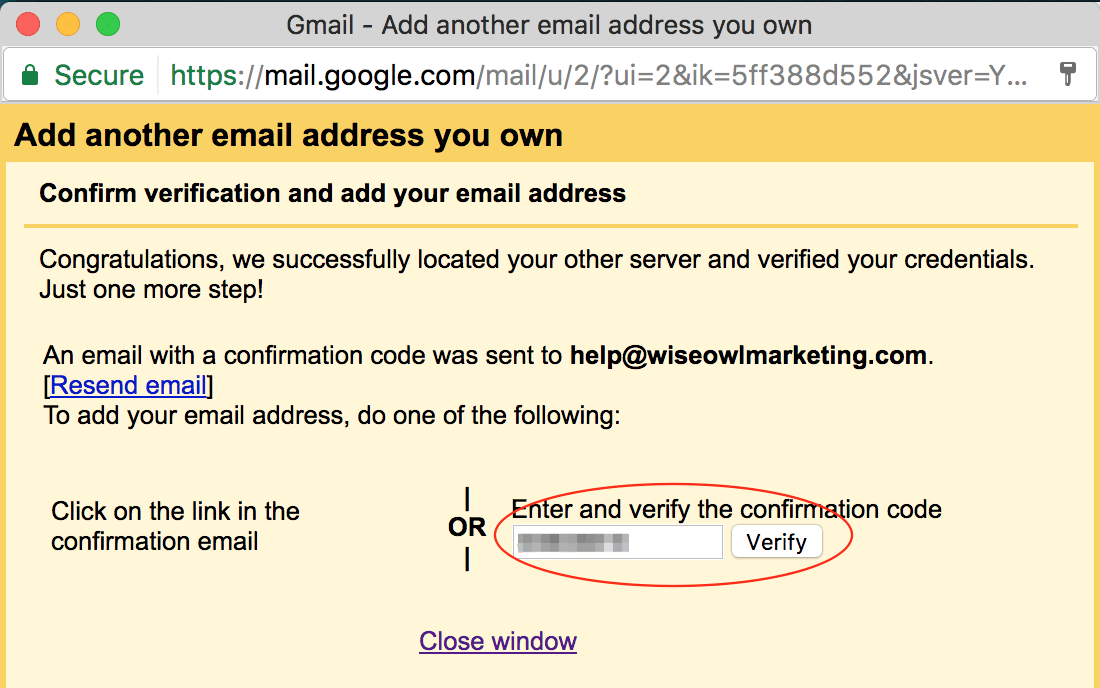
Go back to your Gmail configuration tab and enter the code. Then click “Verify.”
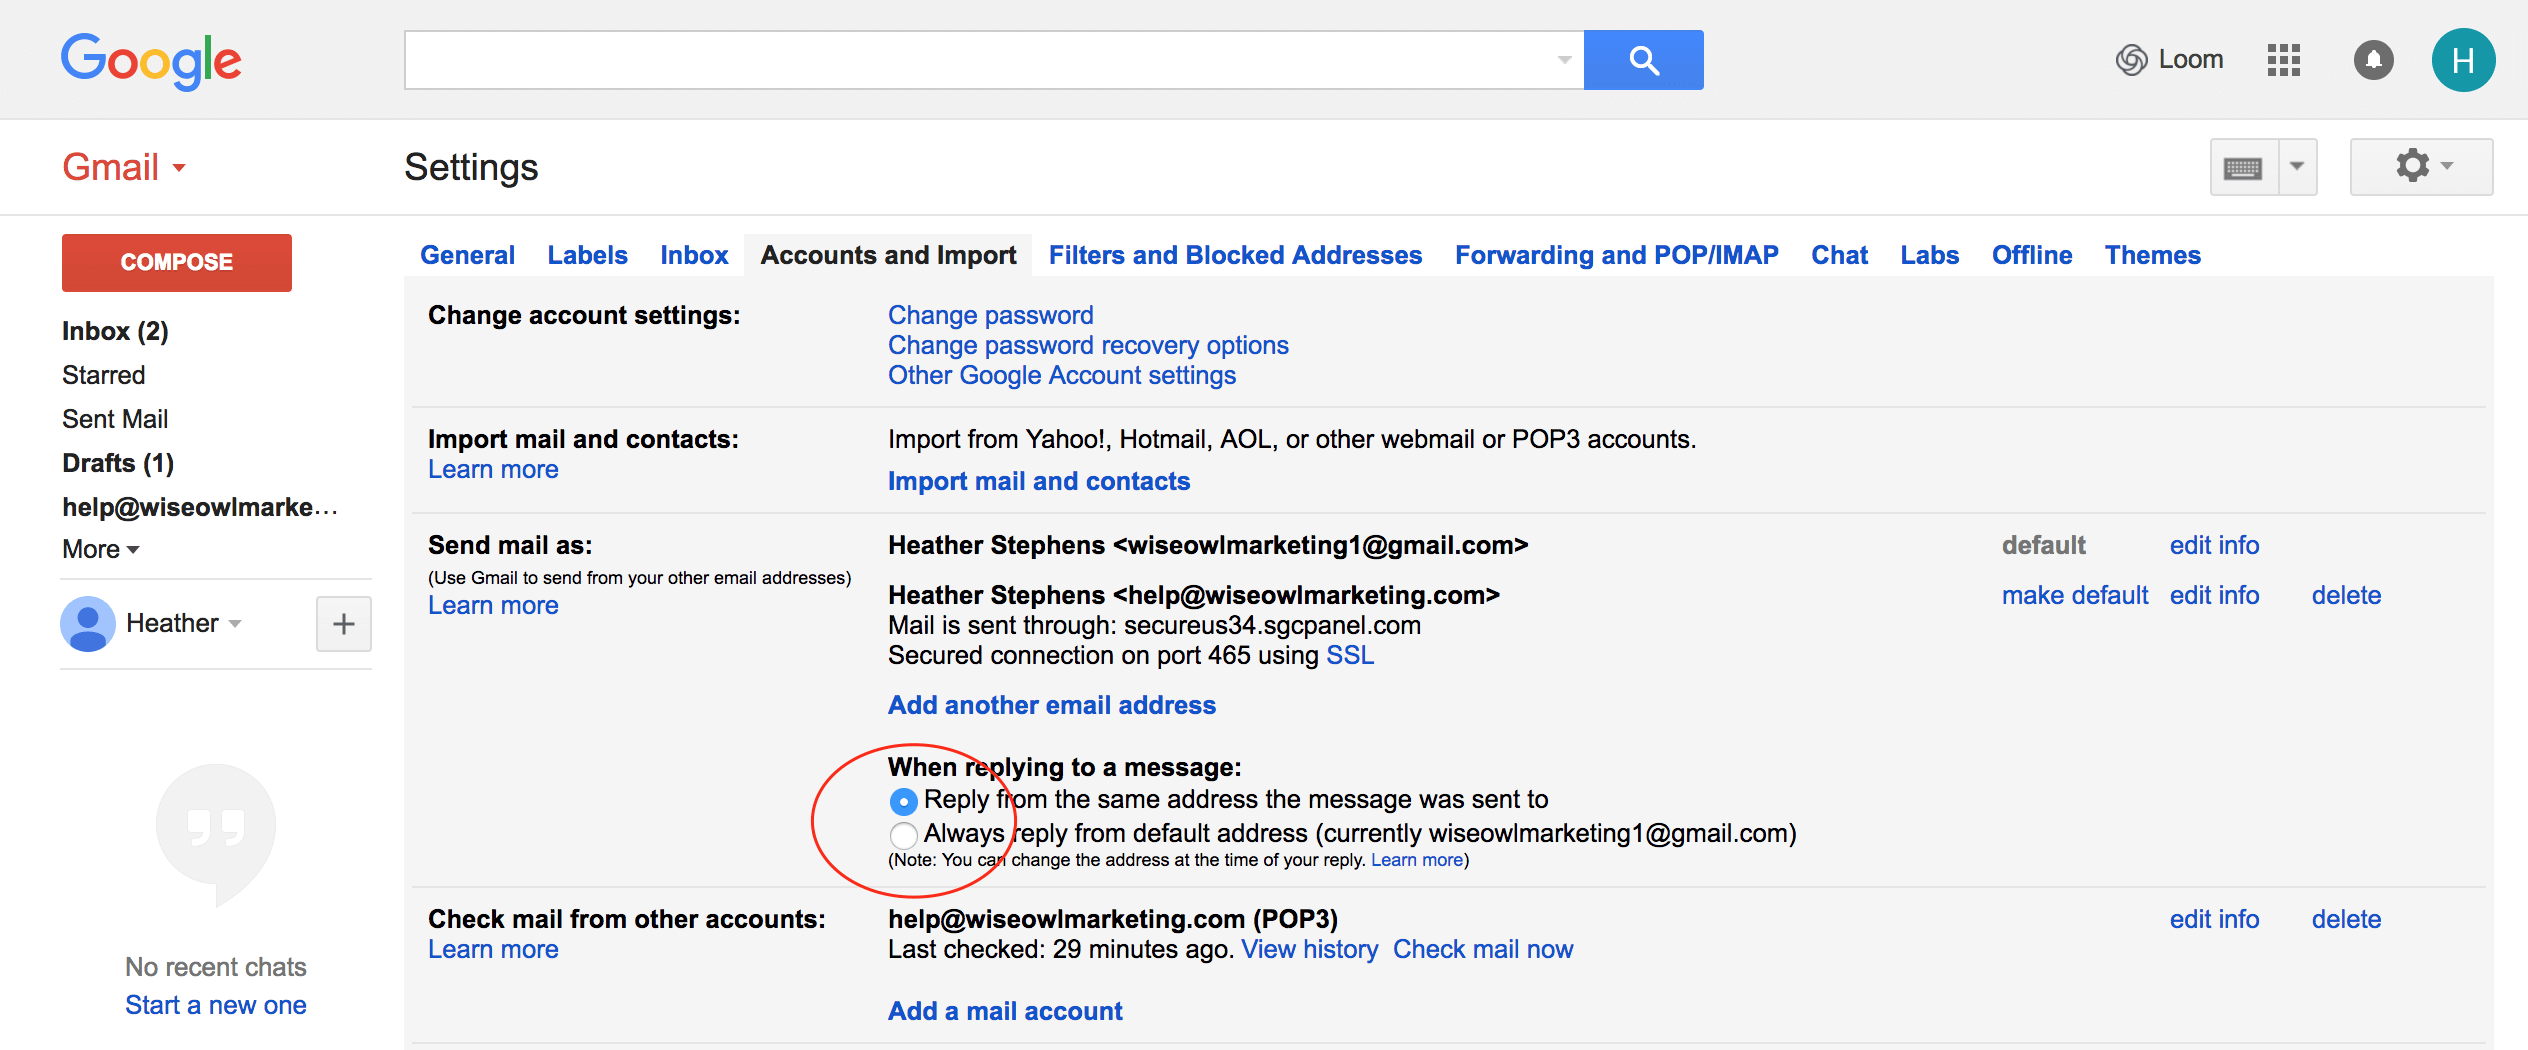
You will need to go back to your Gmail settings and check that you want to “Reply from the same address the message was sent to.”
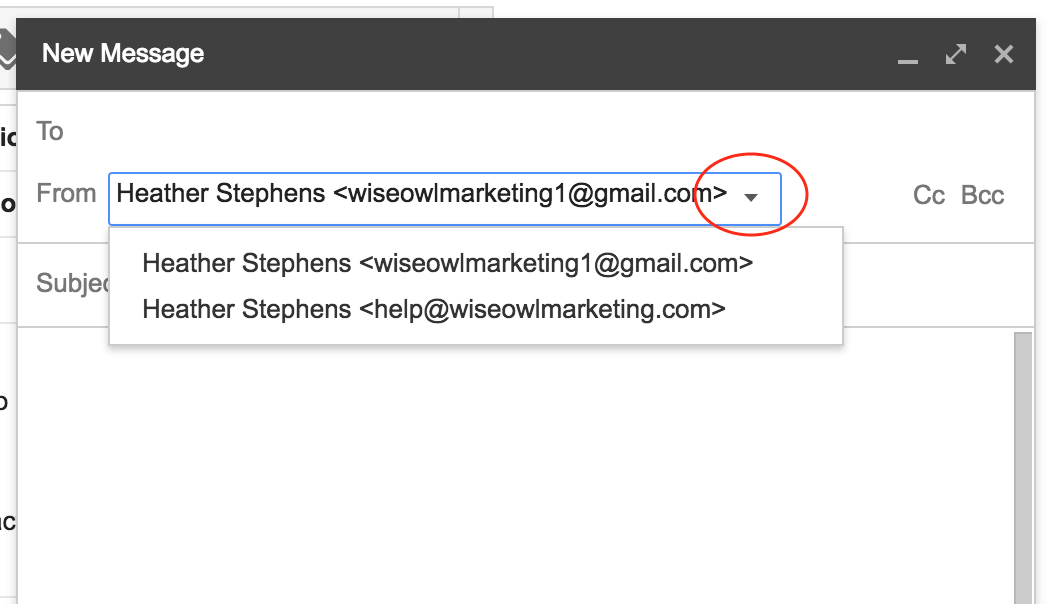
To send an email from your Gmail Account with your new email address, click the drop-down arrow next to the Domain name to choose the email you’d like to use.
You should be all set!
If you have additional emails, you can go through the same process. Gmail will let you add up to 5 emails.
I hope this tutorial on how to add domain email to Gmail was helpful! 🙂
If you need help with building a website and a marketing funnel or developing a marketing strategy for your business, please book a clarity call with me. On this free, no-obligation call we will talk about your business, what’s working and what’s not working for you in terms of your marketing, and then create a tailored plan to help you reach your goals.
Enjoy being able to manage your emails all in one place!
🙂 Heather


Looking for Something Specific?

Where Should I Send Your Free 2026 Marketing Planning Bundle?
*Your free planner will be delivered to your inbox. Check your spam folder if you don't see it within 15 minutes. Submit a support ticket if you need help. By entering your email address, you agree to receive emails, including marketing tips, offers, and announcements, in accordance with my privacy policy.
